Showing posts with label Flakies. Show all posts

Thursday, July 5, 2018

Born Pretty Store Chameleon Holographic Flakies Powder Review

In this post, I will be reviewing the Chameleon Holographic Flakies Powder from BornPrettyStore. I love all things holographic, so naturally this powder jumped out at me. Let's take a look at it:
 
 As with all their powders, this one comes with an eyeshadow brush for application

 This powder looks pretty awesome. I can't wait to get it on my nails!

 It's so pretty!!

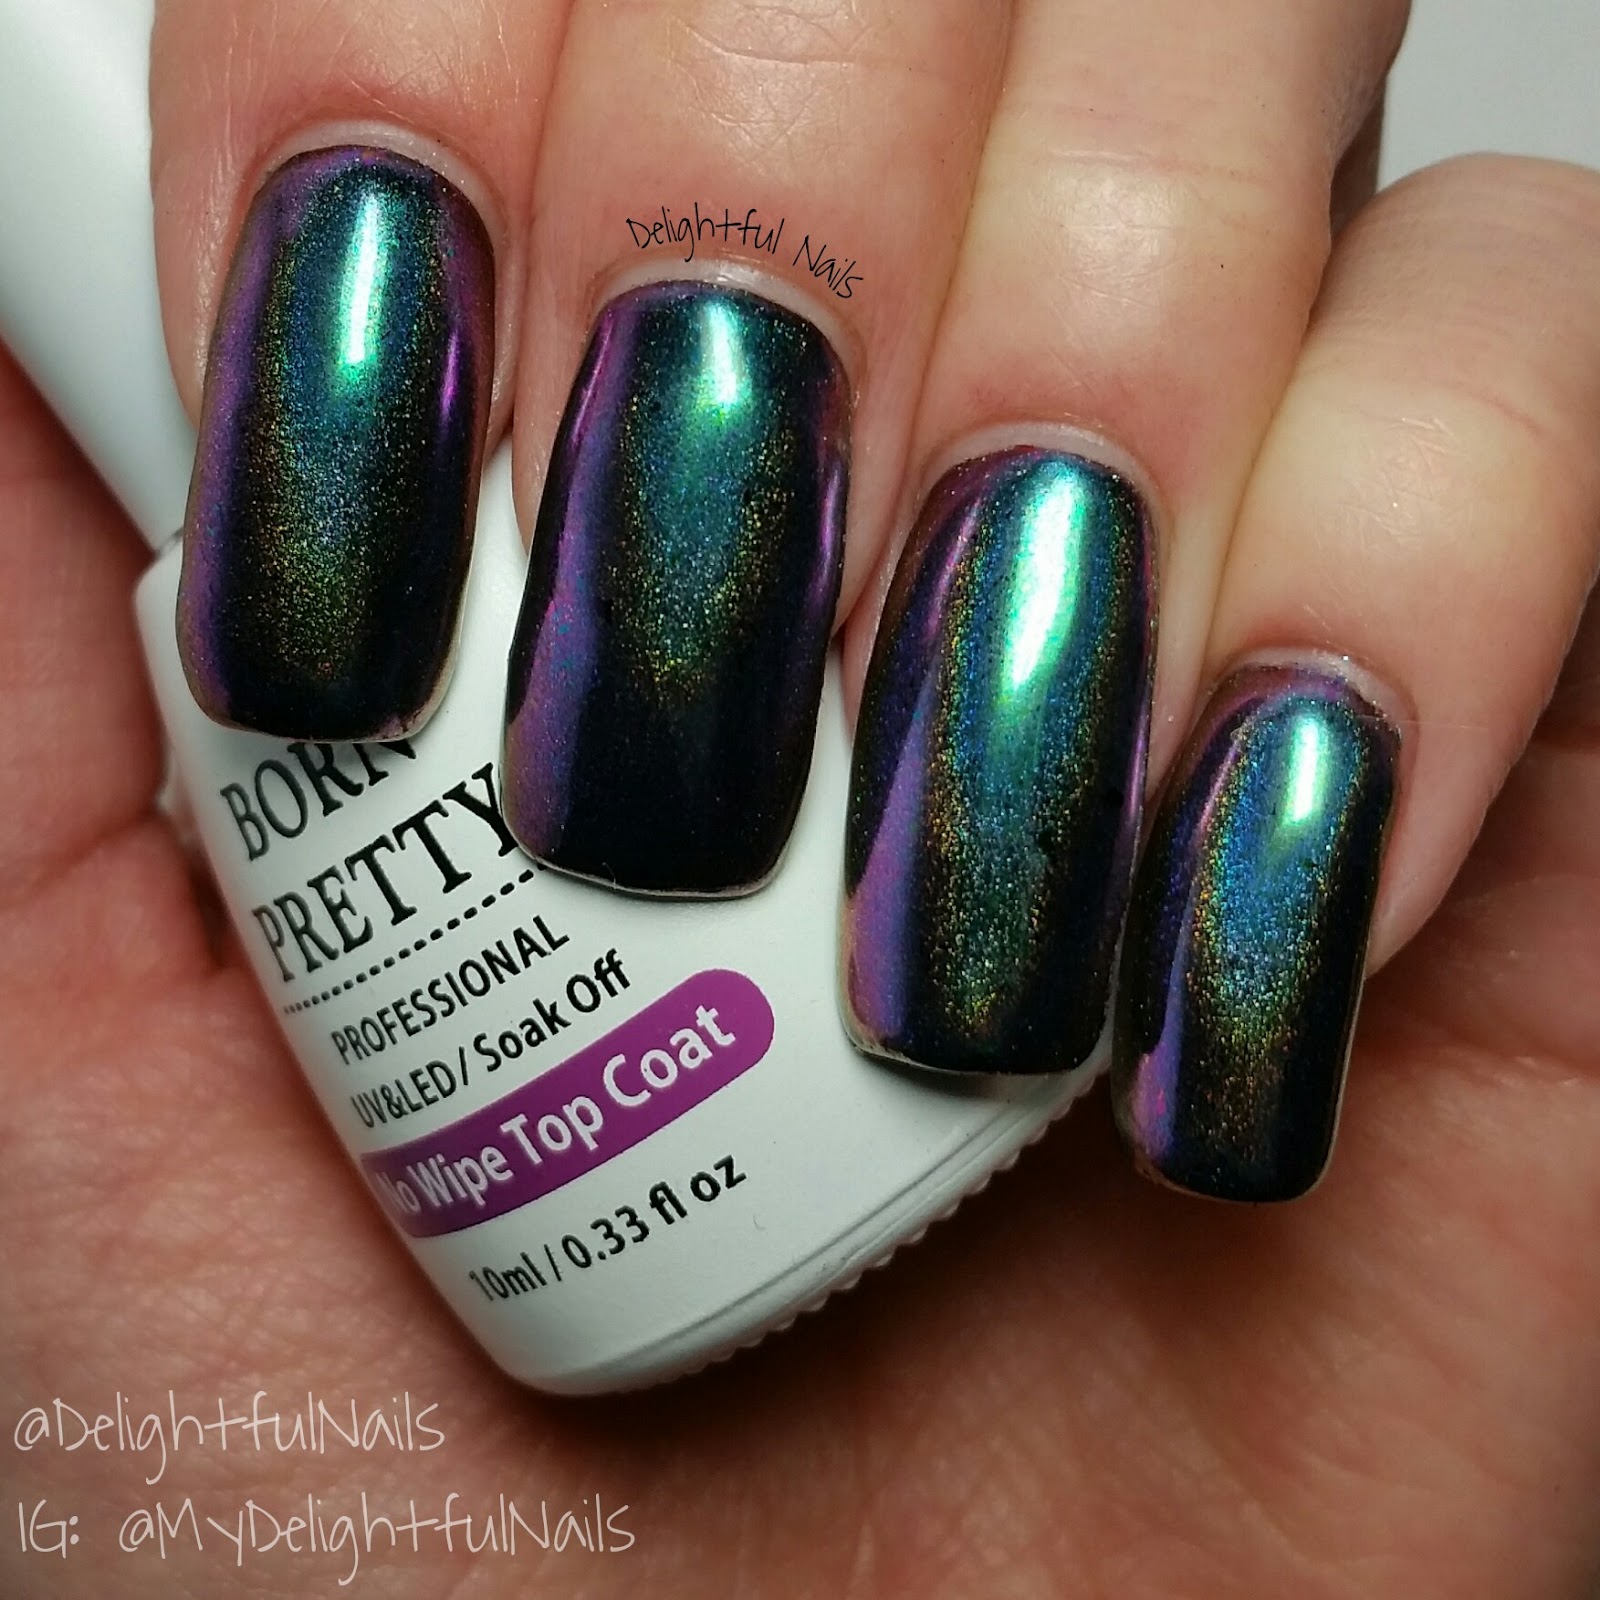
To start off my design, I painted all my nails with one coat of Ate Clavo black gel polish and cured them. Then, one nail at a time, I painted one more coat of black gel polish, cured it, and rubbed the powder into my nail. I sealed it in with a thin coat of Born Pretty Store No Wipe gel top coat (found here) and cured it, applied one more coat of powder, and finished the look off with one more coat of No Wipe top coat and cured it. Here is the final look:
This powder is a deep purple with some amazing holo-ness!!!
This is in direct sunlight.

Overall, I am in LOVE with this powder!! It is super holographic. Even under dimmer room lighting, the holo still pops out. If you are crazy about holo like I am, or even if you like it every now and then, I would highly recommend this powder!!! It seemed very easy to apply (some of them are a bit of work to get on your nails, but not this one). You can find this powder on the Born Pretty Store website, here. They also have tons of other great nail art supplies. Don't forget to use my coupon code for 10% off any regular priced items.


Until next time,


Wednesday, May 23, 2018

Born Pretty Store Colorful Nail Strip Mirror Flakies Review

In this post, I will be reviewing the Colorful Nail Strip Mirror Flakies from BornPrettyStore. These flakies caught my eye because they are very unique and looked like a lot of fun to work with. I chose 3 different colors: gold, purple and pink. Let's take a look at them:


All of the colors come in the same pots as the other pigments and glitters. They also each come with an eyeshadow style applicator. 


These containers seem super full. When I peeled off the seal, a lot of the strips stuck to the top. I opened each one of these over a piece of paper to contain the stray strips :) 

Here is a macro shot of each color. With the light shining on the gold, my camera picked it up as looking silver, but it definitely does NOT have any silver in it

For each color, I painted my nails with two thin coats of Arte Clavo black gel polish (curing in between each coat). This polish feels a lot like a no-wipe top coat does after curing, so I thought I would see what would happen if I tried to put the flakies directly onto the black polish (normally I would add a coat of no-wipe top coat after my color). It worked great! The easiest way I found to pull single strands out of the pot was to use my tweezers and pull a small clump out onto my paper, then gently pull them apart. They wanted to cling to just about everything but with a bit of patience (and no fan blowing on your work area), I really enjoyed using these. For my pinky, middle, and index fingers, I placed single strands randomly on my nails. For my ring finger, I decided to burnish it into my nails as you would with a pigment or powder, for the glossy mirror look. It took 2 layers of burnishing with a thin coat of no-wipe top coat in between. Once I was happy with my look, I sealed it in with one thin coat of my favorite no-wipe top coat from Born Pretty (you can find that here). 
Here is the gold:
 
 
I love how elegant gold looks on the black base!

Now, here is the purple:
 
 
The purple gives the black a nice pop of color!

And finally, here is the pink:
 
 
I love the pink so much! It is so bright and fun!!

Overall, I really enjoyed these flakies. They were a lot of fun to work with and there are so many different things you could do with them. I didn't have any problems with application or wear. I wore the pink flakies for a couple days and when I took my polish off, it still looked as good as when I put it on. If you enjoy fun nail art decorations, I would highly recommend these! It doesn't take much product for a manicure and the container is practically overflowing when you open it! You could do countless different designs with each little pot. These flakies come in 7 different colors and can be found on the Born Pretty Store website, here. They also have tons of other great nail art supplies. Don't forget to use my coupon code for 10% off any regular priced items.


Until next time,


Sunday, November 26, 2017

Born Pretty Store Holographic Chameleon Nail Flakies Pigment Review

In this post, I will be reviewing the Holographic Chameleon Nail Flakies pigment from BornPrettyStore. These flakies are some of the most beautiful things I have ever seen! I can't wait for you to see these!!!! Let's get right to it! I got 2 of the 12 colors (and have already placed another order). Here are the two colors I got:
 This is color #1


This is color #10

For both colors, I started off by painting my nails with 2 coats of Color Club Where's the Soiree, and topped them with Seche Vite. Once that was completely dry, I painted on one coat of my new favorite No Wipe Gel Topcoat. I got this topcoat as part of a base coat/top coat duo. It is also from Born Pretty Store and can be found here. If you are looking for a good gel base coat and top coat, definitely check this set out! I love it! It is a great price for some amazing base and top coat. Anyway, after I cured the top coat, I used a silicone tool like this one, and picked up a small amount of flakies and rubbed it into the top coat. Using my silicone tool, I noticed I got more of the chameleon look as opposed to the holo look. Here is how they look so far:

I wanted more of the holo look so I decided to add one more coat of No Wipe top coat and cured it. This time, I used the eyeshadow applicator that came with the flakies to see if I could pick up more holo. It worked great! This was the look I wanted. Here is the final look:

 
 These flakies are a blueish green and shift to a purple with a strong holo

For the next color, I used the same process as above, except I didn't use the silicone tool. I only used the eyeshadow applicator because I couldn't wait to see the holo! This one seemed like the holo was a bit stronger than the last color. Here is the final look:
 
 This color is a dark pink that shifts to a gold color.

We got a slight break in the clouds so I was able to get a picture of this one in partial sun
Overall, I am absolutely in LOVE with these flakies. Like I said above, I have already placed an order for one more color! I have nothing bad to say about these at all. They are stunning!!! If you love chameleon, chrome, or holo, you HAVE to have these in your life!!! Go order them, NOW! :) You can find these flakies on the BornPrettyStore website here (I showed you colors #1 and #10). They also have tons of other great nail art supplies. Don't forget to use my coupon code for 10% off any regular priced items.


Until next time,


Born Pretty Store Transparent Chameleon Sequins Iridescent Flakies Gel Polish Review

In this post, I will be reviewing the Transparent Chameleon Sequins Iridescent Flakies gel polish from BornPrettyStore. This gel polish looks beautiful, and is different than the other gel polishes I have tried before since you have to apply it with your own nail art brush. Let's take a look at the container:

These flakies look so pretty! I knew exactly what I wanted to do with them. First, I painted all my nails with one coat of white. Then I used Sinful Colors Pink Smart. I used 3 thin coats to make this polish look even and opaque. I topped that with Seche Vite. Next, I used some nail vinyls from Born Pretty Store. These ones are UR Sugar Holo nail vinyls (you can see my review on those here). Once I had the vinyls on, I painted my nails with two thin coats of Color Club Where's the Soiree. Then one more thin coat of Seche Vite. Here is how they look so far:

Finally, I painted one a thin coat of the gel polish and cured them. I sealed the entire design in with a thin coat of No Wipe top coat. Here is the final look:

I also want to show you what they look like over all black nails. I painted my nails with Color Club Where's the Soiree and then one coat of Seche Vite. Once it was completely dry throghout, I put on one coat of these flakies and cured it, then finished it off with my No Wipe top coat. Here is how they look:
They are so colorful and pretty!!!

Overall, I really like this gel. It was much easier to apply than I thought it would be. You don't need a special brush. You could use a nail art brush, a clean brush from a nail polish that you've used up (clean it with acetone really good first!), or even a paint brush if you had to! It goes on smooth, cures to a very hard, finish, and looks so pretty! If you like flakies, and enjoy using gel polish, definitely check this out. You can find this gel polish on the BornPrettyStore website here. It comes in 8 different colors (the one I showed you is #6). They also have tons of other great nail art supplies. Don't forget to use my coupon code for 10% off any regular priced items.


Until next time,