Showing posts with label Chrome. Show all posts

Sunday, January 14, 2018

Born Pretty Store Chameleon & Silver Mirror Gradient Powder Review

In this post, I will be reviewing the Chameleon & Silver Mirror Gradient Powder from BornPrettyStore. I have seen a couple videos on YouTube of people doing powder gradients, but I have never tried one. I am excited to see how it goes. Let's take a look at the powders first:
 
When I first saw the darker powder (above), I wasn't sure how things would turn out, but when the powder is directly under the light, it isn't as dark as it first seemed. It has a very prominent green to purple shift in the container.

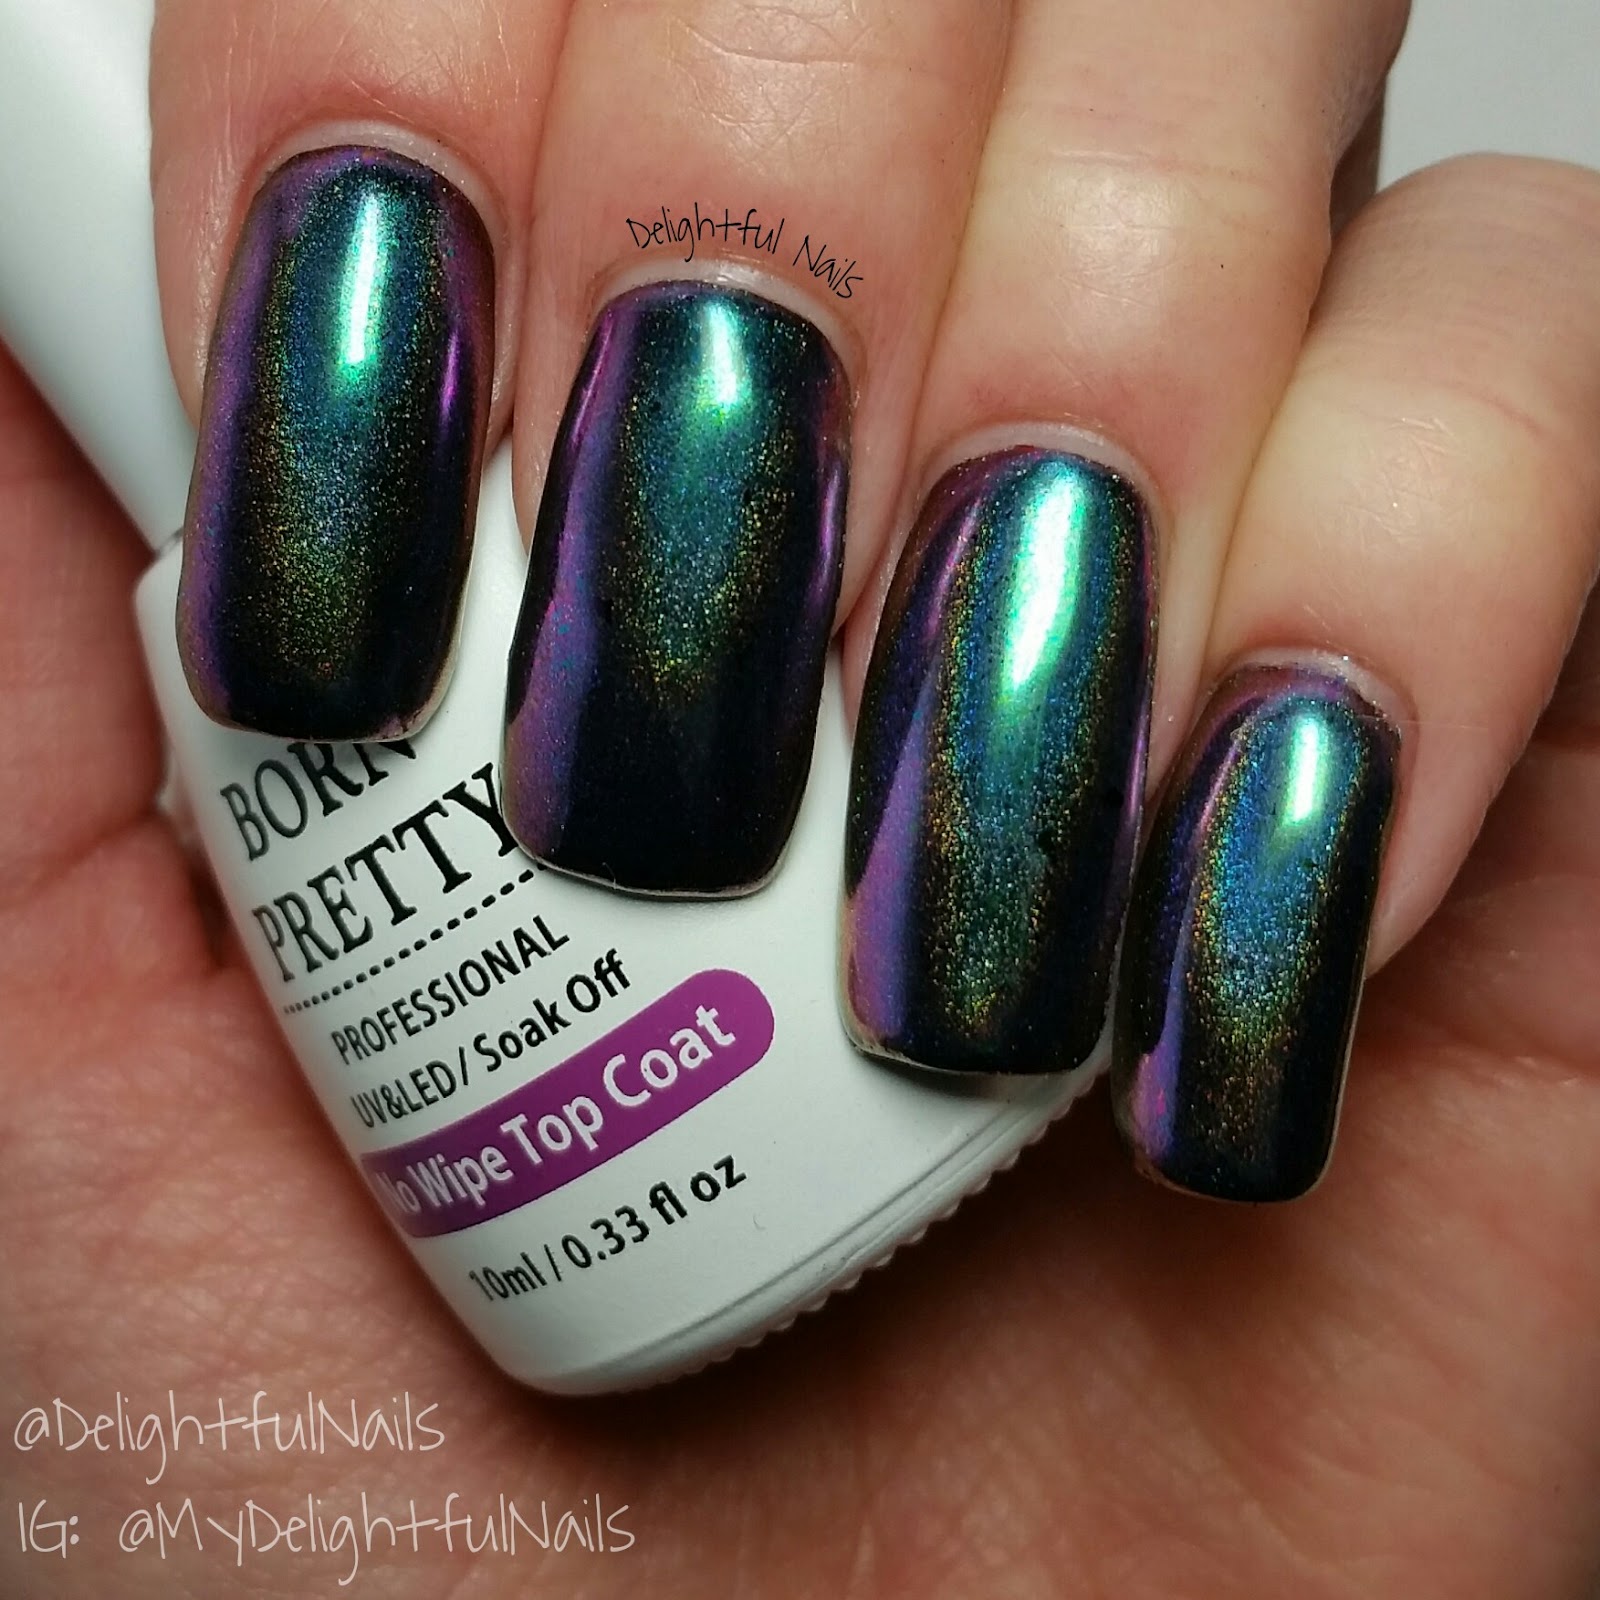
To start this look off, I painted all my nails with Color Club Where's the Soiree (black) and topped them with Seche Vite. After about 30 minutes, one nail at a time, I painted on a thin coat of BornPrettyStore no-wipe top coat (found here) and cured it. I used the eyeshadow applicator and using one side of it, I started out with the darker green to purple powder. It only takes a tiny bit of powder, and I rubbed it into my nails, only going about half to 2/3 of the way to the tip of my nail. On the rest of my nail, I used the other side of the applicator and rubbed the silver into the tip of my nail, trying to blend it together. I added a coat of top coat, cured it, and did one more coat of the two powders, then sealed it in with one thin coat of top coat and cured it. I repeated the process on the rest of my nails. Here is my final look:
They are so shiny and pretty! I love this way more than I thought I would when I first started!

I actually liked this so much, I decided I didn't want to cover any of it up with nail art. It was absolutely stunning!

Overall, this was so much easier than I originally thought it was going to be. It was a bit overwhelming before I started, but I decided the only way to do it was to just jump right in and start. If I messed up, I could start again and know what I did wrong. But it was sooooo easy! I have had so many compliments on my nails (I wore this powder for a couple days). The chameleon shift is very strong, and I had no issues at all getting the silver to have a shiny mirror-like finish. this powder set is a must-have for anyone. And everyone!!! One thing I noticed was that you don't get much of the silver powder, but it takes so little powder to get full coverage and a mirror finish, it will still last for several manicures. You can find this powder on the BornPrettyStore website here (I showed you color #3, there are 8 colors total). They also have tons of other great nail art supplies. Don't forget to use my coupon code for 10% off any regular priced items.


Until next time,


Sunday, November 26, 2017

Born Pretty Store Holographic Chameleon Nail Flakies Pigment Review

In this post, I will be reviewing the Holographic Chameleon Nail Flakies pigment from BornPrettyStore. These flakies are some of the most beautiful things I have ever seen! I can't wait for you to see these!!!! Let's get right to it! I got 2 of the 12 colors (and have already placed another order). Here are the two colors I got:
 This is color #1


This is color #10

For both colors, I started off by painting my nails with 2 coats of Color Club Where's the Soiree, and topped them with Seche Vite. Once that was completely dry, I painted on one coat of my new favorite No Wipe Gel Topcoat. I got this topcoat as part of a base coat/top coat duo. It is also from Born Pretty Store and can be found here. If you are looking for a good gel base coat and top coat, definitely check this set out! I love it! It is a great price for some amazing base and top coat. Anyway, after I cured the top coat, I used a silicone tool like this one, and picked up a small amount of flakies and rubbed it into the top coat. Using my silicone tool, I noticed I got more of the chameleon look as opposed to the holo look. Here is how they look so far:

I wanted more of the holo look so I decided to add one more coat of No Wipe top coat and cured it. This time, I used the eyeshadow applicator that came with the flakies to see if I could pick up more holo. It worked great! This was the look I wanted. Here is the final look:

 
 These flakies are a blueish green and shift to a purple with a strong holo

For the next color, I used the same process as above, except I didn't use the silicone tool. I only used the eyeshadow applicator because I couldn't wait to see the holo! This one seemed like the holo was a bit stronger than the last color. Here is the final look:
 
 This color is a dark pink that shifts to a gold color.

We got a slight break in the clouds so I was able to get a picture of this one in partial sun
Overall, I am absolutely in LOVE with these flakies. Like I said above, I have already placed an order for one more color! I have nothing bad to say about these at all. They are stunning!!! If you love chameleon, chrome, or holo, you HAVE to have these in your life!!! Go order them, NOW! :) You can find these flakies on the BornPrettyStore website here (I showed you colors #1 and #10). They also have tons of other great nail art supplies. Don't forget to use my coupon code for 10% off any regular priced items.


Until next time,


Friday, October 13, 2017

Born Pretty Store Champagne Silver Mirror Shimmer Nail Powder Review

In this post, I will be reviewing the Champagne Silver mirror shimmer nail powder from BornPrettyStore. This powder caught my eye because it is one of the mirror powders that shows the tint of the polish underneath it. I think they look so neat and you have endless options with them. Let's take a look at the powder:
I can't wait to open this up and see what it looks like!
 
It is so sparkly! I can't wait to see what it looks like!!

The first thing I wanted to do was see what this powder looked like over different colors. The colors I chose are all Sinful Colors. On my pinkie, I used Mad About Hue. Then I chose Curry Up for my ring finger, Pink of Me for my middle finger, and Jolt for my index finger. Each nail got two coats of polish, topped with one coat of Seche Vite. I waited 10-15 minutes to make sure my polish was completely dry throughout, then doing one nail at a time, starting with my pinkie, I painted on a coat of No Wipe topcoat and cured it. Once cured, I wiped it off with rubbing alcohol (that seemed to be the trick for me to get that mirror finish) and applied a very light amount of powder to the eyeshadow applicator and rubbed it into my nail. Once I was happy with my results, I followed the same steps for the rest of my nails. Here are my results of my color test:
Notice the wrinkle on my ring finger? I had to redo this nail and I didn't wait long enough before I applied my gel top coat. This is that horrible wrinkling I keep mentioning!! I decided to use this picture anyway so you all could see what I was talking about. And since it was just a color test, I was still able to see what each of the colors looked like

I was pretty stuck between the blue and the purple. I really like how they both look! I decided to go with the purple. Here are my nails painted with Sinful Colors Mad About Hue and topped with Seche Vite, ready for the powder:

And here they are with the powder on:
 
I decided to do a gradient stamping on my two middle fingers. I used plate BP-07, which you can find here. I stamped with Mundo de Unas #15 Mexican Pink and #49 Lavander. I topped these with No Wipe Gel top coat. Here is my final look:

Overall, I really like this powder. I love how you can use different colors under it and it completely changes the look. You can do so much with it! It was very easy to work with and I have nothing bad to say about it. I really enjoyed it a lot. If you like the look of the chrome powders, this is definitely one you need to try! You can find this powder on the BornPrettyStore website here. They also have tons of other great nail art supplies. Don't forget to use my coupon code for 10% off any regular priced items.


Until next time,


Saturday, April 15, 2017

Born Pretty Store Mirror Chrome Pigment Review

In this post, I will be reviewing some mirror chrome pigment from BornPrettyStore. The reason I chose this pigment is because I have seen so many people using the chrome powders and I have yet to try them. I chose this pigment in a teal blue color (#7) because I thought it was unique and a very pretty color. Lets take a look:
It comes in this really neat holographic package


Inside the package, you will find your container of pigment and an eye shadow-type sponge

The container is a clear square container. It reminds me of a diamond because of the way the edges are shaped

The container has a seal on it. Before I peeled it off, I tapped the container on the table a little bit to reduce the amount of powder on the inside of the seal

This powder is a beautiful white, sparkly pigment. I can't wait to see the magic happen!!! Let's take a closer look at its sparkling beauty!


The Born Pretty Store website says to use this with UV polish and No-Wipe top coat. I ordered some polishes and top coat on eBay, but it still hasn't arrived :( It looks like I will have to see what I can do with this powder with the polishes I have on hand.

I painted my nails with Funky Fingers Gesso (white) and Dark Knight (black), alternating nails. Here are the polishes I used:


After I painted my nails, I topped them with Seche Vite. Once that was very dry and hard, I did one nail at a time. Before I started my nails, I tested several different products to see what was going to work best. The best option I had on hand for this pigment was Orly Bonder. I also had better luck using a silicone "brush". It looks like a chisel and it is very soft and flexible. I got a set of 3 different silicone brushes (they aren't really brushes, they are more like tools, but the description said brush) on eBay for just over a dollar with free shipping from China. Shipping was super fast. You can see the whole set here.  This is the one I used with this pigment:


I started with my index finger. Everything was going great, until I pressed too hard. I dented the Orly Bonder! So I started over on that finger, and started on my pinky this time to let my index finger dry. I did one finger at a time so the Bonder didn't dry too much and the pigment would stick. Oh my goodness! This pigment is beautiful!! I love how different it looks over black and white polish.

This is the nail I messed up

They turned out pretty good for not having the top coat I needed! I really love how it looks over black!

Here is a macro shot over white

I am abolutely in LOVE with this pigment. I can't wait to use it again with the No-Wipe Top Coat. Even without it, this pigment is beautiful. And is very possible to use without gel polish under it. I never tested top coats over the pigment, except for regular gel top coat. 

Overall, this pigment is definitely worth purchasing. I am already thinking about which other colors I would like to have! I really enjoyed applying it and seeing the color magically appear! The containers seem kind of small, but you use so little pigment for each manicure, it will last quite a while! After testing, messing up, and finally getting good results, you can't tell I have used any at all. Definitely pick up this pigment in your favorite color! It is well worth it! You can find it on the Born Pretty Store website, here. They also have tons of other great nail art supplies. Don't forget to use my coupon code for 10% off any regular priced items.

Until next time,