Monday, July 17, 2017

Born Pretty Store Transparent Chameleon Nail Flakies Review

In this post, I will be reviewing some Transparent Chameleon Flakies from BornPrettyStore. I have really been into flakies lately, so I cant wait to get these on my nails. Let's check them out:
 This pot of flakies came with an eye shadow applicator
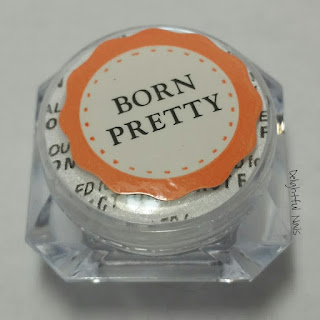
We need to open this container and get a closer look!!
These look amazing! Let's get them on some polish! :)

I was curious to see how these would look over different colors. I started out with Sally Hansen Insta-Dri Cinna-snap on my index finger, Sinful Colors SinfulShine Most Sinful on my middle finger, Sinful Colors Go Go Boots on my ring finger, and Wet n Wild Black Creme on my pinkie. I topped these off with Seche Vite. Here's how it looks so far:
Next, when I knew everything was dry all the way through, doing one nail at a time, I applied a No Wipe Top Coat to each nail and cured it. Once cured, I decided to use my silicone brush instead of the eye shadow applicator. I got mine on eBay, but you can find a similar one on BornPretty Store's website, here. Mine is like style #3. I picked up a tiny bit of flakes at a time, and gently patted them on my nails, being careful to not leave big spaces empty, as well as not get the flakes too hick in other places. Once all my nails were done, I made sure the flakies didn't have any edges sticking up, and sealed them in with one more coat of gel top coat. Here they are:
Outside, in direct sun

Outside, in the shade

Nothing was jumping out at me like those flakies over black! Let's do it! I painted all my nails with Wet n Wild Black Creme and topped them off with Seche Vite. Once dry, one nail at a time, I did the same steps as above and applied the flakies to my nails. On my ring finger, I put them on thicker, so they had full coverage and no black spaces in between. Here they are at this point:
Inside, under my OttLite
Look at that color shift!!!

Here they are again, inside under the OttLite

 Outside, in the shade

 A slightly different angle, outside in the shade

Both of these macros were also outside in the shade

The shift these flakies give is absolutely amazing! I decided to add a simple stamp to my ring finger, to finish it off. Personally, I think I like these without the stamp better. I used plate BPL-024 from BornPrettyStore, found here. I stamped with Mundo de Unas Black and sealed it in with one last coat of gel top coat. Here is the final look:
Inside, under my OttLite

Outside, in the shade

And last but not least, the macro under my OttLite

Overall, I am in love with these flakies! If you love flakies, you will definitely love this! The shift is very intense, which makes them absolutely beautiful! You can find these chameleon flakies on the Born Pretty Store website, here. They also have tons of other great nail art supplies. Don't forget to use my coupon code for 10% off any regular priced items.


Until next time,


Born Pretty Store Chameleon Holographic Flakes Powder Laser Nail Flakies Review

In this post, I will be reviewing some Chameleon Holographic Flake Powder from BornPrettyStore. I love flakes and I love holographic nails, so I couldn't pass this one up. Let's take a look:
This pot also came with an eye shadow applicator. This powder looks like a regular holographic powder from the bottom of the pot. I couldn't wait to open it and see what it looks like:
These flakes look interesting. I am intrigued! I couldn't wait to get them on my nails!!!

Let's get started! First, I painted my nails with 2 coats of Wet n Wild Black Creme, and topped it off with Seche Vite. Once I was sure they were dry, it was time for the magic to happen. Doing one nail at a time, I painted a coat of No Wipe Top Coat and cured it. I decided to use my silicone brush instead of the eye shadow applicator. I got mine on eBay, but you can find one similar on the BornPrettyStore website, here. Mine is like style #3. I dipped the tip of the silicone brush in the flakes, and rubbed it into the No Wipe Top Coat. It took a couple nails to get the hang of it, and ended up re-doing a couple of my nails once I figured out how much powder I needed and how much to rub. Once all my nails had the powder applied, I finished them off with one more coat of gel top coat. Here is how it looks at this point:
Inside, under my OttLite

Outside, in direct sun

Macro shot, inside under my OttLite

WOW! I am in love with these powder flakes! I wish the holo would have showed up on camera a bit more, but it is definitely there and noticeable in person. I decided to stamp some tropical-looking flowers over this polish on my ring finger. I used Moyou London stamping plate Mother Nature 11, and stamped with Mundo de Unas stamping polish in Mexican Pink. I finished that nail off with one more coat of gel top coat.
 
 
Overall, this is a great powder! I love the color, I love the holo, and I love how easy it is to work with.Once you get the hang of it, these flakes are so much fun! I can't wait to use it again! If you are a holo fan, you definitely need to check out these powder flakes. They come in 6 different colors (I chose #2). You can find these flakes on the BornPrettyStore website, here. They also have tons of other great nail art supplies. Don't forget to use my coupon code for 10% off any regular priced items.


Until next time,


Born Pretty Store Chameleon Multi Chrome Gel Polish Review

In this post, I will be reviewing some Chameleon Gel Nail Polish from BornPrettyStore. What really caught my eye with this polish was the color shift. It was very pretty. I can't wait to see it on my nails! Being a gel polish, there isn't much to see with the bottle.


I started out by painting all my nails with Wet n Wild Black Creme, and topped it with Seche Vite. I made sure they were VERY dry before continuing (if you apply gel polish and cure it with slightly wet polish under your Seche Vite, you will get what looks like wrinkles in your base color). Using a very little amount on the brush, I painted a super thin layer of the gel polish on my nails. I cured it, and did one more thin layer, cured it, and sealed it with a gel top coat. This took a bit of experimenting. If you get too thick of a layer of gel polish, it gets a grey look to it and you don't get much of the color shift. Here is how it looks at this point:

 Inside, under my OttLite


Outside, in direct sun

Macro inside, under my OttLite

This polish reminded me a lot of galaxy nails. So I decided to stamp them with BornPrettyStore plate BP-03, found here. I used Mundo de Unas stamping polish in silver. I finished it off with one more coat of gel top coat. Here is the end result:
I had to stretch the image a bit to get it to fit my nails, but I still like the way it looks!

Overall, I really like this polish. If you have the patience to get the coats VERY thin, you will love this polish. The shift is subtle, yet very pretty! You can find this chameleon polish on the BornPrettyStore website here. They also have tons of other great nail art supplies. Don't forget to use my coupon code for 10% off any regular priced items.


Until next time,


Born Pretty Store Unicorn Mirror Powder Review

In this post, I will be reviewing some Unicorn Mirror Powder from BornPrettyStore. This powder was suggested to me and after having some time to experiment with it, I fell in love with it. Let's take a look:

This pot of powder also came with an eye shadow-style applicator

Let's open this up and take a look!
My first impression was that it doesn't come with much powder in the pot. We will get to that in a few minutes, but first, a macro shot!
I love the green sparkle. I couldn't wait to see what it could do!

My first idea was to see what it looked like over a few different colors. Then I could plan a design. I started with Wet n Wild Black Creme on my thumb, Sinful Colors Sinful Shine Most Sinful on my index finger, Sinful Colors Thimbleberry on my middle finger, Sinful Colors Go Go Boots on my ring finger, and Sinful Colors Pistache on my pinkie. I topped them all off with a coat of Seche Vite. Here is how it looks so far:
 I forgot to have my thumb in this picture. Oops

Doing one nail at a time, I applied a coat of No Wipe Gel Top Coat, cured it, and applied the powder. I started out using the eye shadow applicator, but decided to use my silicone "brush" tool instead. The one I use was purchased on eBay, but you can find the same type of brush on the BornPrettyStore site, here (style 3 is similar to what I used). After I had the powder rubbed in and was happy with the result, I sealed it in with another coat of gel top coat. Before I show you how it looks, I wanted to talk one more time about the amount of pigment in the pot. Like I mentioned before, my first thought was that there wasn't much pigment in the pot. It takes very little pigment to cover each nail, so although it doesn't look like a lot, you will get MANY manicures out of this little bit of pigment. I just dipped the surface of my silicone brush into the pigment, just enough to pick a little bit up, rubbed it in completely, and added a little bit at a time, until I was happy with the coverage.

Here is how it looks:
 Inside, under my OttLite

 Outside, in direct sun

 Outside, in the shade

 Do you see that blue shift over the black polish?

Let's check out the macros:
Thumb, over Wet n Wild Black Creme

Index finger, over Sinful Colors SinfulShine Most Sinful

Middle finger, over Sinful Colors Thimbleberry

Ring finger, over Sinful Colors Go Go Boots

Pinkie, over Sinful Colors Pistache

I really like the way it looks over the blue polish, but I still wasn't getting any ideas. I had a wedding to attend, and I thought I should try white and pink, to match my dress. I painted my index and pinkie fingers with Funky Fingers Gesso, and my two middle fingers with Sinful Colors Pink Poppys. It is more pink, compared to Thimbleberry (which looks like it has more of a red tint). I did the same process as above, one nail at a time. After I applied the pigment, I stamped with Mundo de Unas stamping polish in white, and used BornPrettyStore plate BP-28, which can be found here. I sealed it all in with one more coat of gel top coat. And I absolutely fell in love with them. They were beautiful and perfect for the event I attended that evening.

Inside, under my OttLite
 
 
Outside, in direct sun 
 
 
 Outside, in the shade

Here are some macros:
 

I love how different these look in the direct sun and in the shade (the shade is my favorite!). 

Overall, I am so glad this powder was suggested to me! If you love powder, iridescent pigments, this is a must have! And for a great price!!! You can find this powder on the BornPrettyStore website here. They also have tons of other great nail art supplies. Don't forget to use my coupon code for 10% off any regular priced items. 


Until next time,